By Edith Schmidt
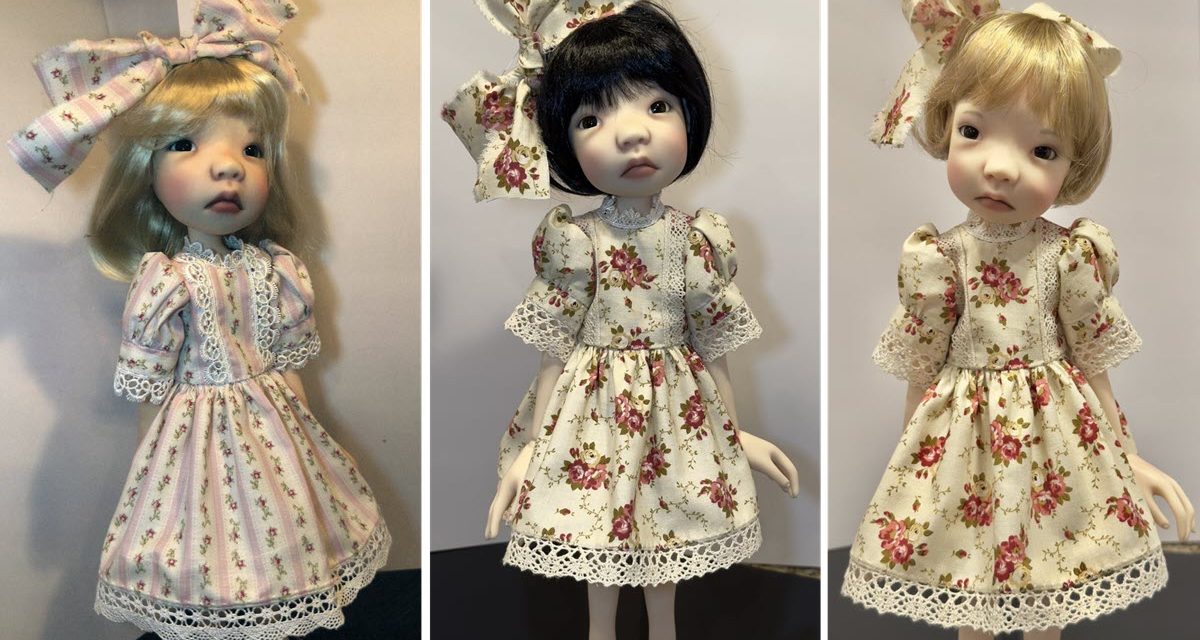
This pattern was created for Connie Lowe’s 16-inch Meili and Stella dolls, although dolls with similar measurements can also wear the completed outfit. It takes about six to eight hours to make, excluding time spent cutting out pieces. If creating three to four at a time, it is possible to complete them all in two days.
To Begin
Make a copy of the pattern and use it to cut the individual pieces out of cardboard. These can be used to easily trace the pattern onto the fabric with an air erasable pen. Cut directly inside or on the line to maintain proper sizing of pieces. If you intend to make multiple outfits, it’s recommended to cut all pieces before beginning to sew; plastic bags or boxes can help keep pieces organized.
When deciding on the amount of fabric to use for the skirt, consider how you want it to appear in fullness and in length. The dress shown on Meili has 22 inches of fabric for the skirt waist and is 5.5 inches long with a ½-inch lace trim. A waist length of 16 to 18 inches will result in a skirt that is less full. Tear the fabric for the skirt instead of cutting it. This helps find the straight of the grain and eliminates wavy borders. Clip the fabric ¼ inch from the edge and tear both the hemline edge and the waist. I use this technique when working with batiste for making dresses with pintucks, tucks, and lace. A pintuck foot can be used to sew multiple pintucks around the hem of the garment, giving the skirt bottom more body.
It’s easiest to sew in stages if you are working on multiple garments. For example, you can start by applying lace to all of the intended pieces before moving on to assemble each component of the outfit.
Materials
- Approx. ½ yard of cotton fabric
- Approx. 2 yards of lace or other trimo
- 22 inches for skirt
- 14 inches for sleeve cuffs
- 10 inches for pant legs
- 10 inches for neckline
- 8 inches for front bodice
- Approx. 5 ½ inches of elastic
- Thread
- Closures of choice
- Air erasable pen
- Scissors
- Sewing pins
- Cardboard (optional)
- Forceps (optional)
- Bamboo skewer (6-8 inches) (optional)
- Fabric glue pen (optional)
Depending on the fabric, you will want either metal or nylon snaps for closures. When working with batiste, I prefer nylon snaps but will sometimes use metal. Choose a size suitable for the scale of the garment.
Dress Bodice
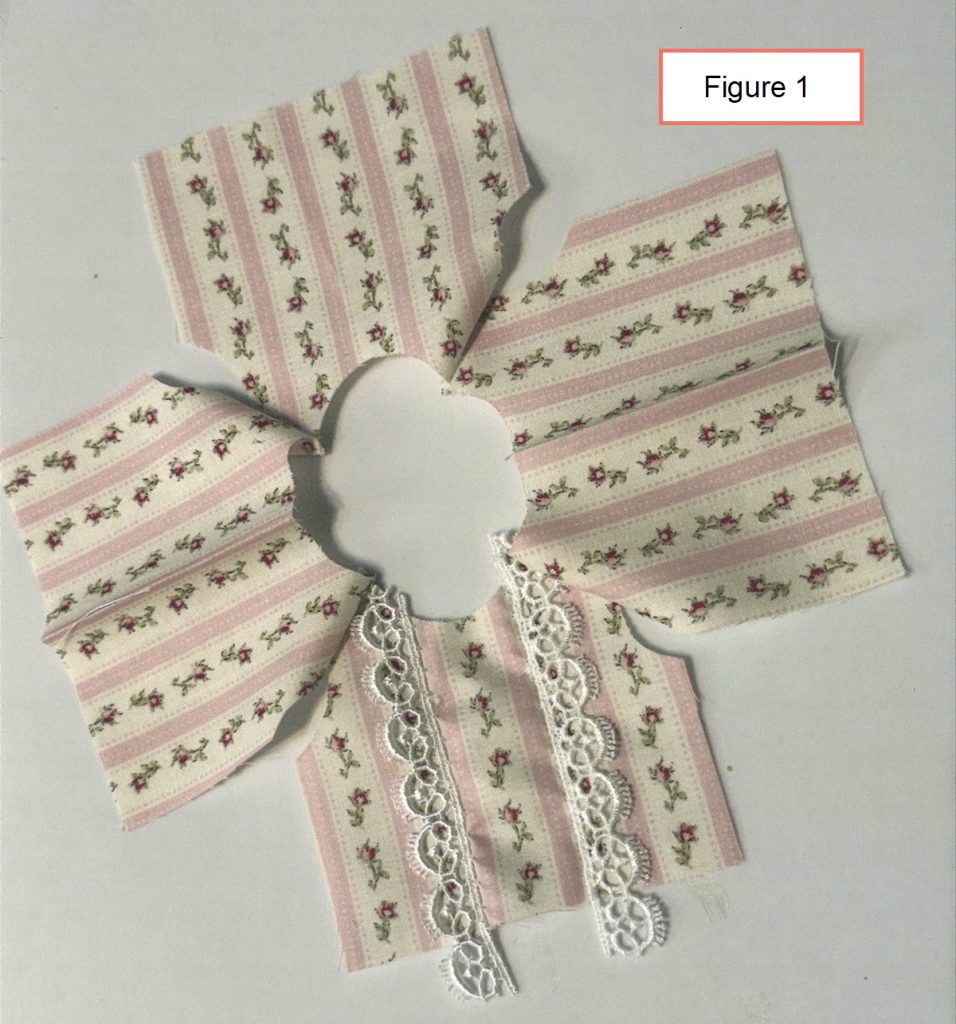
Using two bodice fronts and two bodice backs, sew the backs to the fronts at the shoulders with right sides together (RST) — alternating back piece, front piece, back piece, front piece. They should form a circle (see Figure 1). If lace, tucks, or other trims are desired on the front of the bodice, sew them onto one front piece before attaching it to the remaining three bodice pieces. I use Sewline fabric glue pens to temporarily attach lace to the bodice, which holds it in place while sewing. The glue disappears when dry.
When finished sewing at the shoulder, fold the back pieces in half to create a half circle. This will result in a lined bodice when finished. Iron the selvage at the shoulders toward the back.
Sleeveless
Stitch the neckline and the armholes RST. For 16-inch Meili and Stella, I use a #2 stitch length and sew ¼-inch seams. For smaller dolls, I use a 1.5 stitch length and sew ⅛-inch seams. I often sew the seams a second time to reinforce them and to make turning the bodice right-side out easier. Small forceps are helpful for manipulating the fabric at this stage. Before turning, clip the selvage around the neckline and armholes so the fabric will lie nicely. Iron the bodice and stitch the side seams RST. Then iron the side seams open.
With Sleeves
After stitching the neckline RST, decide if the cuff of each sleeve is to be hemmed or if lace is to be attached. If attaching lace, use the 1.5 stitch setting on your sewing machine to sew it to the fabric RST. Use an iron to press the selvage toward the shoulder and then stitch it again from the right side, securing the selvage to the cuff. As an added touch, I like to stitch over the lace by hand. Add a straight stitch along the cuff’s top edge.
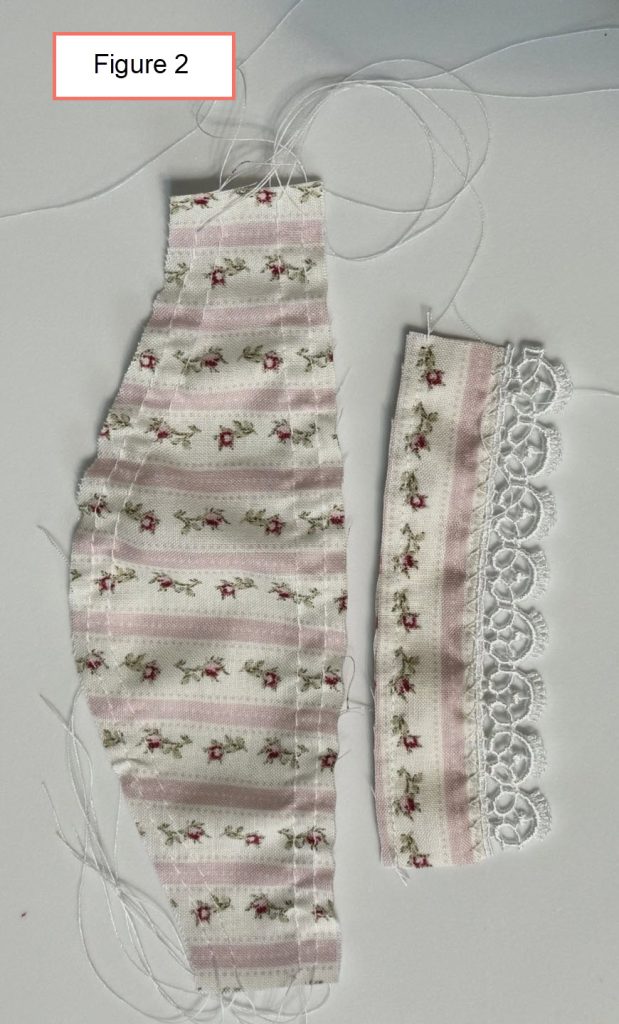
Add two rows of gathering threads along both the top and bottom edges of each sleeve (see Figure 2). Gather the fabric of the lower part of the sleeve toward the center of the cuff. Sew the sleeve and cuff RST and finish the seam with a zigzag stitch.
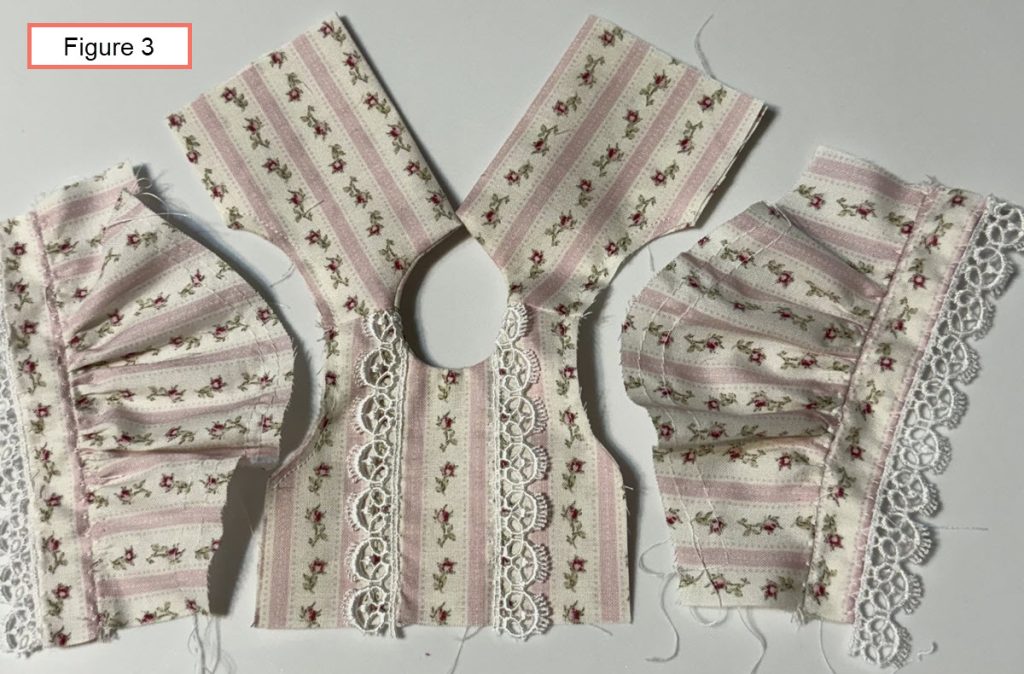
Inserting sleeves can be a challenge with smaller outfits, especially if you are using a sewing machine. When setting each sleeve, gather the extra fabric by hand so that it is positioned on the top portion of the armhole (see Figure 3). The fabric on the lower side of the armhole should not be gathered. Once the sleeves are attached to the bodice, sew the side seams from the top to the bottom and finish them with a small zigzag stitch.
Finishing Touches
I like to complete the bodice by stitching around the bottom; this holds the fabric in place as the bodice is sewn to the skirt.
This is the time to add lace to the neckline if you want it. Using a zigzag stitch, carefully sew the lace to the neckline. I use a short bamboo skewer to hold the lace in place. Lace that is flexible or loosely woven will work better when sewing around the neckline. Alternatively, gather the lace into a ruffle and sew to the neckline.
Add the closures of your choice to the back of the bodice.
Skirt
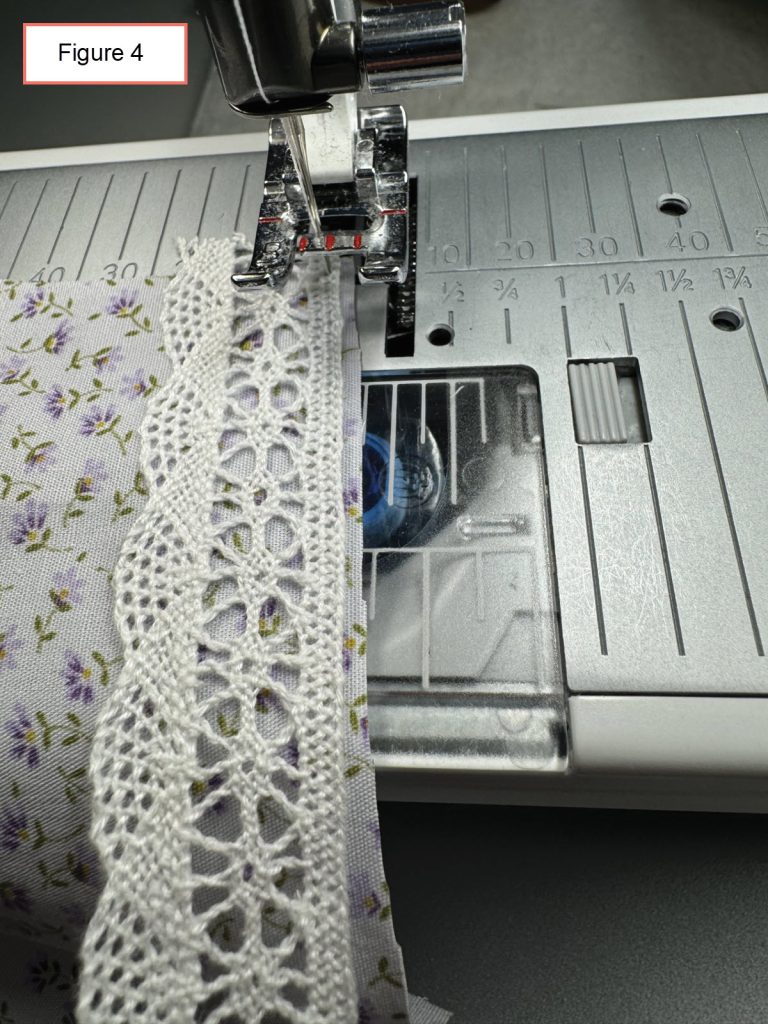
First, decide how the hem is to be finished. There are three main options: attach lace (cotton or rayon), attach decorative trim, or add a decorative stitch above the fabric edge to create a fringe edge (for a more casual style). If using lace, there is often a front and back side, with the front having a more obvious pattern. Place the lace/trim RST on the bottom edge of the fabric and use a zigzag stitch to join them (see Figure 4). Fold the selvage under, positioning it toward the waist and away from the bottom of the skirt, and iron this edge. Use a zigzag stitch a second time to go over the lace-on-fabric seam on the right side of the skirt fabric. This will secure the lace and prevent it from coming loose.
Attach Skirt to Bodice
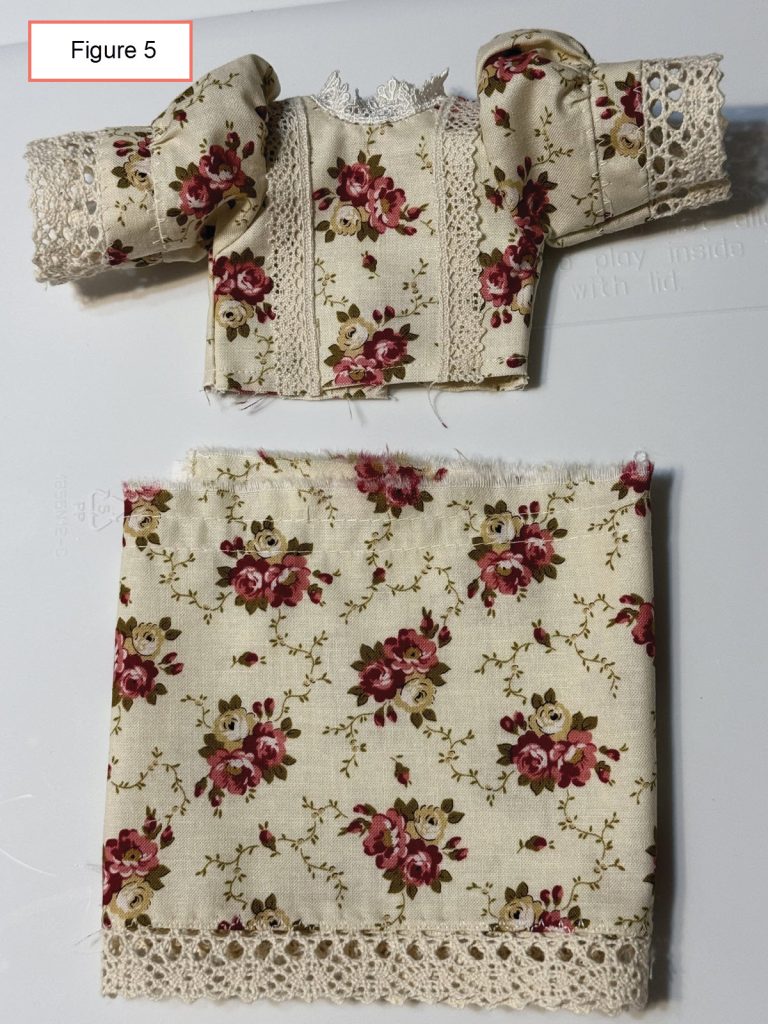
The next step involves gathering the skirt fabric by hand and attaching it to the bodice (see Figure 5). To start, sew two rows of gathering threads to help control the gathered fabric. Use straight pins to attach the gathered fabric to the bodice, being careful to evenly distribute the fabric along the waistline. Sew the skirt to the bodice, removing the pins as you are sewing. Once the skirt fabric is secured to the bodice, use a zigzag stitch to sew a second line of stitches along the waistline. On the right side of the waistline, use a third line of stitching to secure the gathered fabric to the bodice and to ensure the skirt will hang nicely. Note, the selvage should be stitched to the bodice fabric, not folded toward the bottom of the skirt.
Stitch the back seam of the skirt RST. Use a straight stitch first, and then go back over the fabric edge with a zigzag stitch.
Pantaloons
Stitch the front seam of the pantaloons RST using a straight stitch. Then use a small zigzag stitch on the seam to finish the edge.
Sew lace or trim on the bottom of the legs using heirloom techniques. If desired, you can also add embroidery, tucks, or pin tucks.
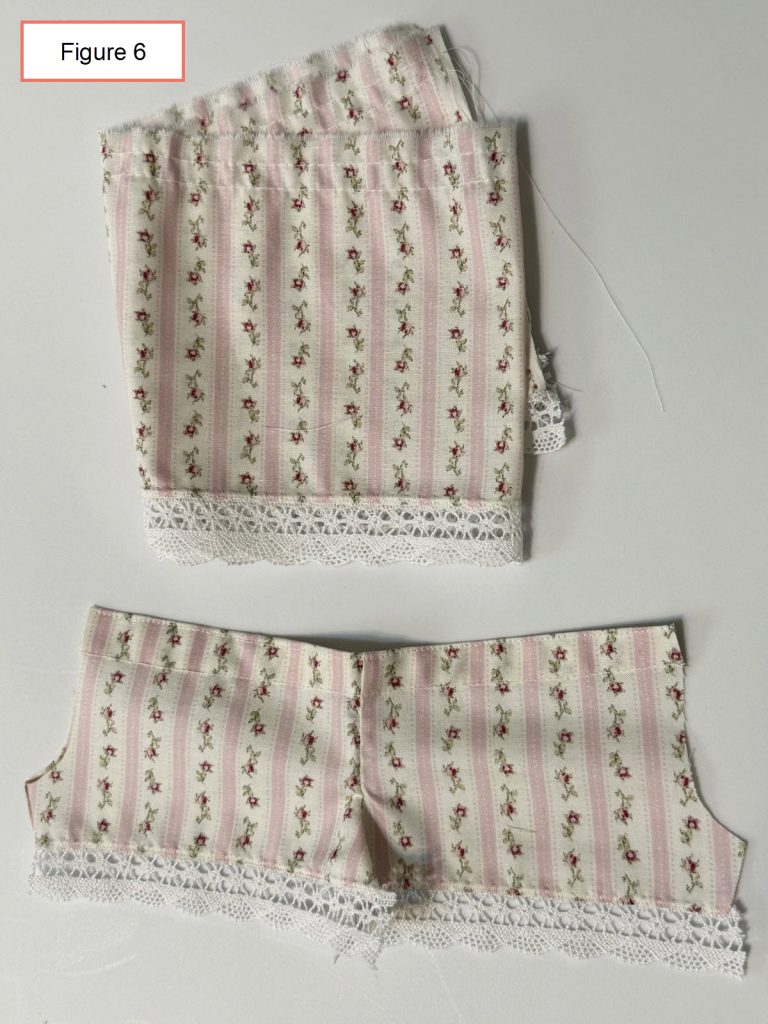
Next, sew a placket on the waist, turning the fabric over twice and stitching down (see Figure 6). Feed the elastic through the placket and gather the fabric to the waist size. Stitch the back seam RST, making sure to secure the elastic inserted inside the placket. Finish the edge using a small zigzag stitch, and stitch down the selvage at the waist.
Fold the fabric so the front and back sides for each leg are touching. Sew straight and zigzag stitches along the seam. Tack the lace or hem at the bottom of the leg to secure the seam end.
If making shorts or capris, follow these same instructions.
Have a website login already? Log in and start reading now.
Never created a website login before? Find your Customer Number (it’s on your mailing label) and register here.
Not a subscriber? JOIN HERE
Still have questions? Contact us here.

