
By Joyce Greenholdt
Cameras in cellphones and other devices can take great photos, and when it comes to photographing a doll or similar small item, there are some simple things you can do to achieve sharp, detailed photos. The following tips are meant primarily for individuals intending to send in images for a column like Curious Collector, to get identification or additional information about a doll or other item.
To start, if your device has different resolution or quality settings, choose the highest ones available in order to get the largest pictures possible. And when it comes time to send the photos, beware of helpful prompts asking if you want the device to make the images easier to send — say no. Otherwise, the person receiving the photos will get smaller, lower-quality versions of your originals, which makes it harder to see the important details.
Setting Up
The place where you take your photos is just as critical as the camera settings. Find a stable spot for the doll to stand that’s more than a foot in front of a plain, solid-color background that doesn’t distract or blend in with the doll and outfit. You need enough light for the camera to capture the image quickly and a way to keep it steady. The more light is shining on the doll, the less time the camera needs.
Something like a kitchen table or a desk can be the surface for your photo shoot — they’re usually big enough that you can position the doll on one side and still have enough space to rest your elbows, helping keep the camera steady when you take the photo. Ideally, you want two light sources placed in front of and to the sides of the doll — a couple of table or desk lamps or a lamp on one side and natural light from a window on the other would work.
The wall — or whatever you’re using as a background — should be more than a foot away from the doll. Digital cameras are pretty good at “recognizing” and focusing on a face, but the extra separation will help ensure the camera focuses on the doll and not, say, the amazing texture of a bath towel draped behind it or the wood grain pattern of a wall panel. For a doll dressed in bridal white, avoid backgrounds that are white or have a strong pattern. Even if your only option is to lean it up against a sofa or chair back, draping a plain tablecloth or propping a piece of cardboard behind the doll will give better results than a floral-print cushion (especially if the doll’s outfit is made from a print fabric, too).
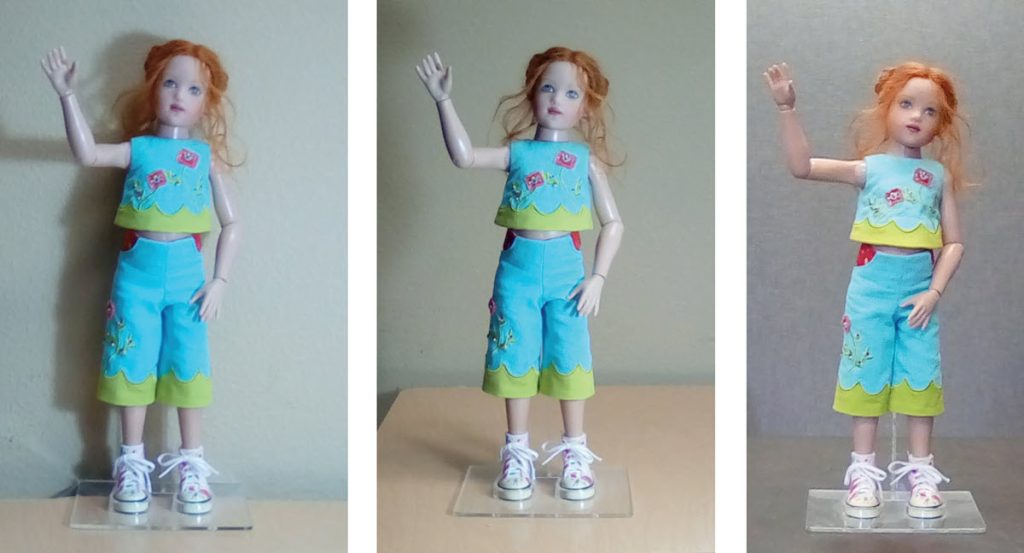
Look at the three photos above.
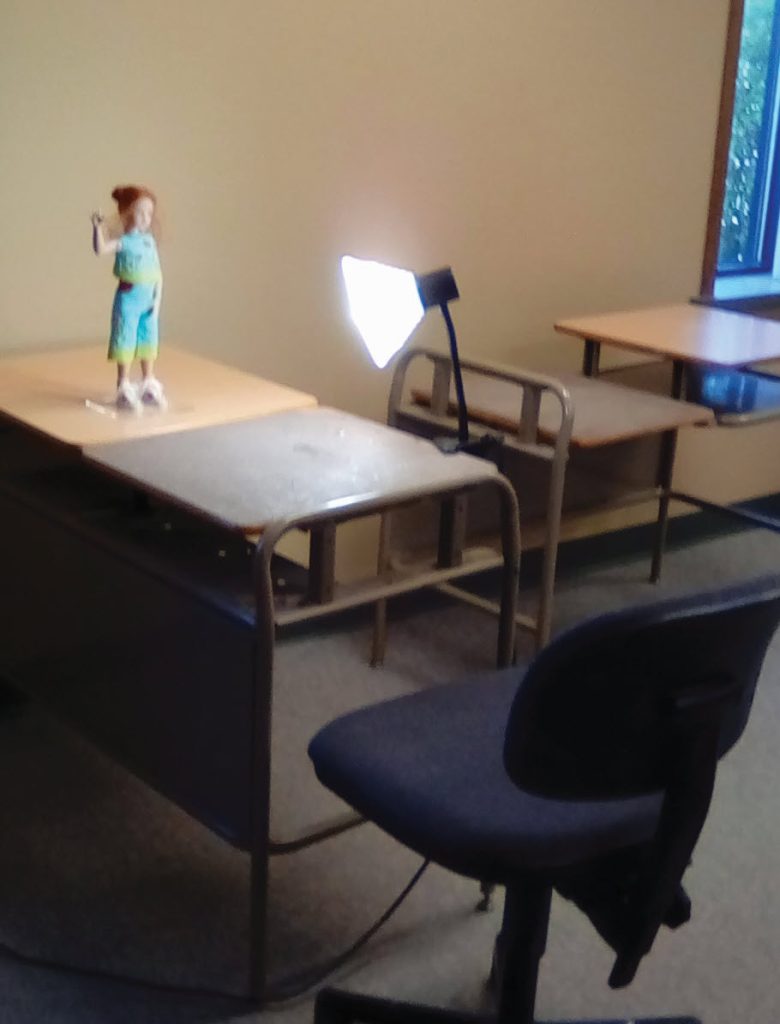
In the first photo, I placed this Kish & Company doll on a desk right next to the wall. You can see that the light (mostly from a desk lamp in front and to the right of the doll) causes a harsh shadow behind the doll. Next, I moved the doll forward, until it was around 14 inches away from the wall. There’s still a faint shadow off to the side. For the third photo, I turned around and moved the doll to a table 5 feet from the fabric cubicle panel in the background; the desk lamp is still to the front right of the doll and there’s sunlight from a window to the left.
I used the camera in my tablet to take the photos. I sat in a chair at the edge of the desk or table and leaned forward for each shot, bracing my elbows against the flat surface. Making a triangle by holding the device up with both hands, I was able to keep the camera steady and use a gentle touch on the screen to activate the camera. The only thing better would have been if I had an actual tripod — you can get them for use with a cellphone or other device, but that’s an investment that makes more sense if you want to do frequent photo shoots.
Get Ready for Your Close-Ups
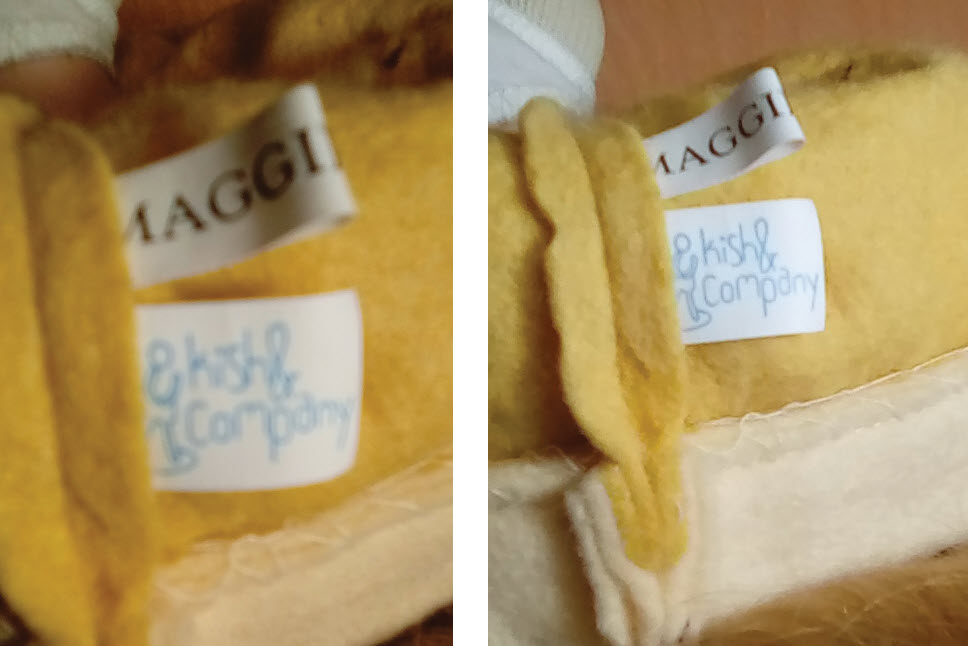
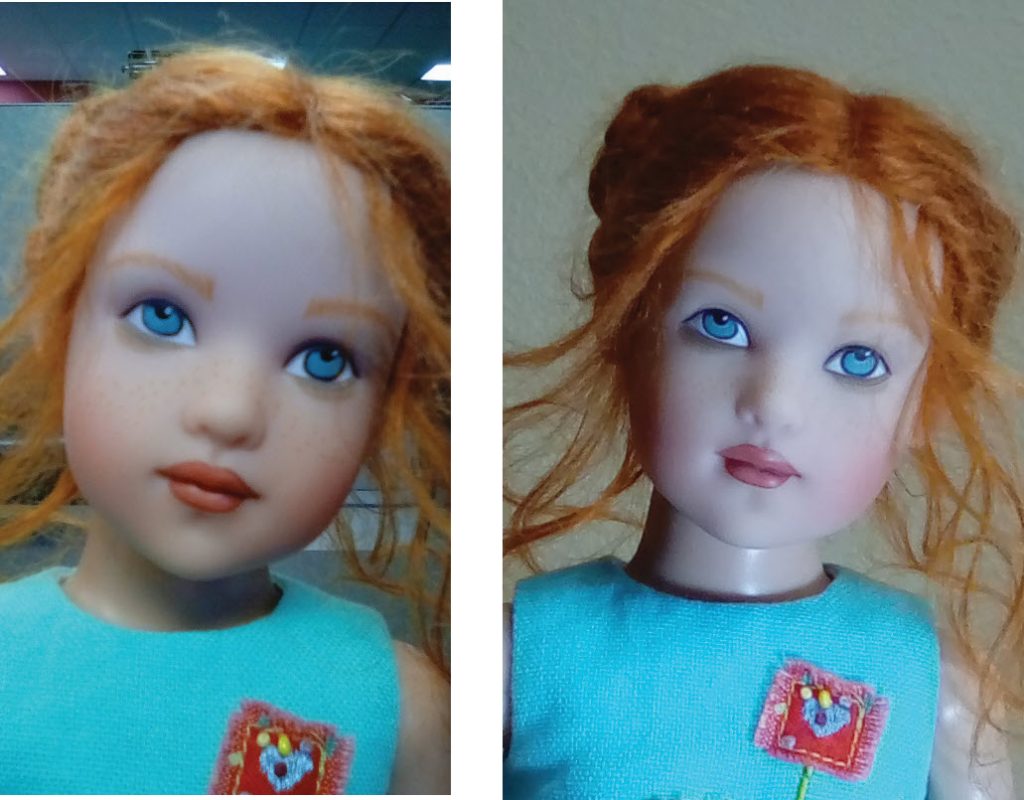
Full-length photos are the first step — definitely of the front and often of the back of the doll. Make sure the camera catches the entire doll. You may also want images of the packaging. Close-ups showing the doll’s face, details of the costume, and even closer images showing a tag or logo imprinted on the doll (or damaged areas) can provide necessary information and may be helpful for an expert working to identify and/or appraise the doll.
When preparing for a close-up or detail shot, it’s tempting to move the camera in until the detail you want fills the view-screen. But watch closely — is the image on the screen getting fuzzy when it’s that close? If so, you need to move the camera lens back out until it is in sharp focus. Yes, the important part of the image will be smaller, but it will be in focus.
Oddly enough, the key to getting good close-up shots is often not getting too close. Some newer devices offer what’s called a macro setting, which lets users take close-in pictures of small details and objects. But you can still get good close-up images without a macro mode or buying a special macro lens.
With a bit of prep work and creative use of items in your home, you can take the kinds of photos that will give an appraiser or doll expert the information they need to help you figure out the origin of a new acquisition, find out more about its place in doll history, and get an idea of its value.


